

It's been awhile since we've done any hardware reviews and now thanks to Zaxon (Piotr Bugaj), creator of the DDI3 USB Floppy Emulator and the Amstrad CPC 6128 USB Floppy device we have a new hardware device to review; the Amstrad CPC 6128 USB Internal Floppy Emulator. This latest hardware from Zaxon replaces the disk drive and enables the Amstrad to run disk files from an USB memory stick with clearly visible LCD display. But is this latest addition to the Amstrad worthy of a purchase? Check out our review and find out.

For awhile now I've always used the Amstrad CPC 6128 USB Floppy Emulator, but the problem is not only is it prone to being snapped by some careless hands, it also looks a little untidy as an extra power splitter is needed and it doesn't have any LCD display to show you what file is currently ready for use. Not to say it's a bad addition to my collection, far from it, but thanks to Zaxon it is about to be replaced by the Amstrad CPC 6128 USB Internal Floppy Emulator

Already as can be seen above this latest change looks so much better, it has a clear LCD display at the front for viewing files, easy to access buttons for changing disk drive files, a front SD slot for a usb memory stick containing demos and games, connections for power, floppy cable, and all this enclosed within a printed case that will soon be out of the way and secure.

Here's a better comparison between the two, with the Amstrad CPC 6128 USB Internal Floppy Emulator on the left and the Amstrad CPC 6128 USB Floppy Emulator on the right. The latest addition looks far better with no extra wires coming out of it and bare parts shown. It just looks so much neater and more professional.

And this is when the fun begins! If you're brave enough and good with a screwdriver and not worried about opening up an expensive bit of retro kit, then carry on reading. If not stick with the old hardware emulator ;). The first thing I had to do was to get the case apart, which required a screwdriver for the back screws to reveal the internals including the original disk drive.
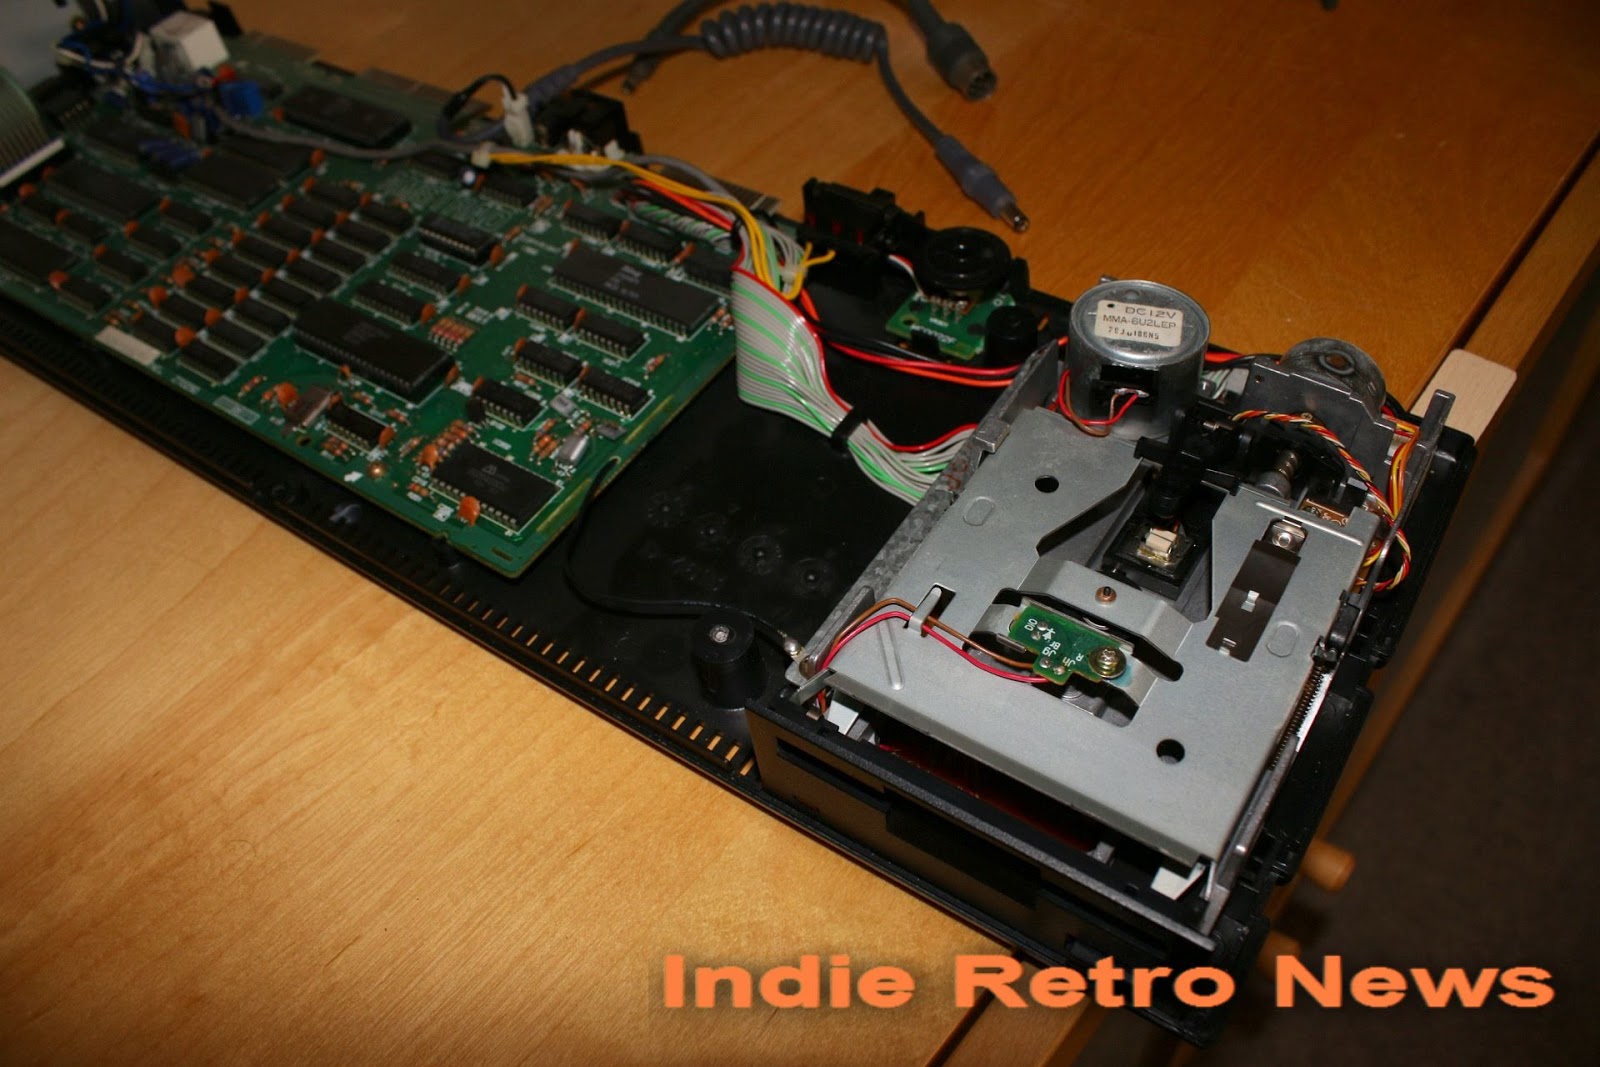
Upon opening the case you will be greeted with the image above, some in worse state than others. Attached to the back of the disk drive will be a floppy cable and power cable. Thanks to Zaxon unlike the Gotek or HXC modification you don't need to modify any cables inside, it's simply a matter of attaching the right way as can be seen below.

On the topic of cables I'd highly recommend writing down TOP on both the floppy and the power cable, this is because if you ever need to re-attach the disk drive, you'll know which way round they go. Plus it makes it easier to attach to the Amstrad CPC 6128 USB Internal Floppy Emulator.
Oh and do keep all the screws, there is nothing worse than a lost screw!

Sadly this is when it went down hill fast for me, as when I tried to slowly screw in the left bracket, it snapped straight away. There was no hard force involved it just snapped, which means that this part is going to be the weak point and it's just way too thin for support. Perhaps I could find a better way to keep it secure?

I decided to use the old metal bracket from my original disk drive to give it that extra support, which held it in nicely but I couldn't push the case down and it looked wonky. This took a good hour of fiddling and frustration and thus I just had to make do without using the metal bracket.

Here's what it looks like above with the metal bracket attached, it may be snug and stopped it from moving but it just wasn't going to work, I had to stick with the snapped plastic and somehow work my way around it to get this hardware installed!

Another issue I came across with the printed casing was the side holes. Which were not aligning properly even when the Amstrad CPC 6128 USB Internal Floppy Emulator was in the correct position. This caused one end of the casing to move up or further out of the way every time I tried to tighten a screw with the Amstrad back together. This was becoming a nightmare!

Thankfully it all worked out in the end with a bit of persuasion and some double sided tape, I had the emulator hardware installed in the correct place, it looked really nice and the case was ready to go down and ready for trying out all those games! Just take a look at how clean it looks now, no wires, no showing circuits or pins, brilliant.

Upon booting the Amstrad you should see a very clear and bright LCD screen, which is really good for the eyes in a dimly lit room. Now usually I go through a long list of instructions or pictures showing you how to install the software on a USB memory stick to get it to work, but this time I'm going much further. Using my old USB stick, I've backed up just the core files and a few games for you to use and to get it up and running straight away just like the photo above. It all looks so classy, it really makes the Amstrad shine and what's more with every file used it shows up on the display.

Just admire the glorious colours of the Turrican 2 music disk, made far more impressive with the latest addition to my Amstrad showing the disk Turrican 2 on the LCD display. All I need to do is press each button left or right to go through the listed disks, and the third button I believe stores them ready to be accessed just in case during multi disk swapping games. You can of course select other games and save them for later playing via the provided menu accessed by typing run"hxc at the main prompt screen.

And that's pretty much all there is to it for my play testing experience. Now unlike before when I raved about good the external USB device was, this one had some very annoying design flaws in the printed case. The side bracket was too thin and way too easy to break, the screw holes on the sides didn't align properly even with the printed case moved all the way forward and a set of instructions with fitting would've been beneficial.
Other than that I really do like the Amstrad CPC 6128 USB Internal Floppy Emulator. It is now my go to gaming device for all that is Amstrad. I like being able to see bright and clear text on the LCD screen showing me exactly what disk is ready for use and having all the cables out of the way and easily attachable without any form of modification, especially that internal power cable is a huge bonus.
Worthy of a purchase? yes, but the printed case may need extra reinforcement.
For further information follow the links below.
Links : 1) Contact 2) Buy Now 3) The Amstrad CPC 6128 USB Floppy Emulator 4) DDI3 USB Floppy Emulator for the Amstrad CPC 464 5) USB Files ( Unpack )
No comments:
Post a Comment
**ENGLISH ONLY** Anonymous Allowed - Constructive Criticism - Abusive or nasty comments towards developers or our readers will be removed. Play nice and enjoy IndieRetroNews! :)